

Adding outline markup to your website is a great way to help search engines like Google understand your content more quickly and accurately.
One of the lesser known ways to use schema markup is to include “entities”. Adding entities to your schema can help Google better understand the key topics in your content.
In this article, I’ll walk you through a step-by-step process for using entities in schema markup.
Why use entities in schema markup?
So why go through the hassle of adding entities to your schema markup when Google’s natural language processing capabilities (like BERT and MUM) already help the search engine understand the content of your article?
The answer is that both writers and AI sometimes fail to communicate and accurately identify the meaning, context, and importance of an article’s topics.
Imagine going to your favorite local restaurant and seeing a delicious-looking burrito on the menu, but it doesn’t say what kind it is or what’s in it.
So you order it and when it arrives, you have to find out with your senses to pick up all the contextual clues to what makes up the dish.
You can probably figure out most of the ingredients if you have enough cooking experience, but probably not all of them, especially if there are spices mixed in!
Using entity schema is like giving Google all the main ingredients for your article, making it inherently easier for them to identify and understand the most important topics in your article without any confusion.
Doing so removes the pressure of ensuring that words are used perfectly within the article and its sentences to convey its meaning and importance.
Adding entities to your article schema
The following process gives me a lot of control and less reliance on third-party plugins. However, if you want to go the plugin route, check it out WordLift.
Either way, reading this guide will help you better understand how Google and NLP tools see your most important topics.
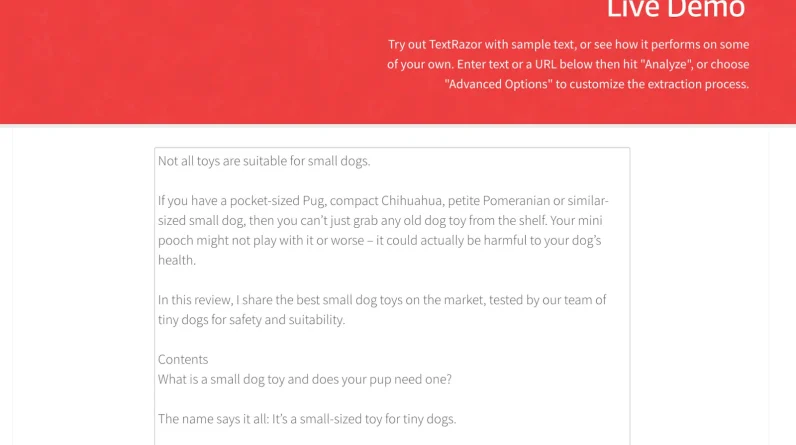
Let’s say you have an article titled “10 Best Toys for Small Adult Dogs”.
Here are the steps to identify the most relevant entities for this article and add them to the schema markup.
Step 1: Analyze your article with TextRazor
Start by copying and pasting your article text into the file TextRazor demo and clicking the “Analyze” button.
(For this guide, I’m using the text of the article from DogLab.)
Step 2: Identify relevant entities
On the results page, you’ll see a list of top entities or topics ranked by relevance in the right sidebar.
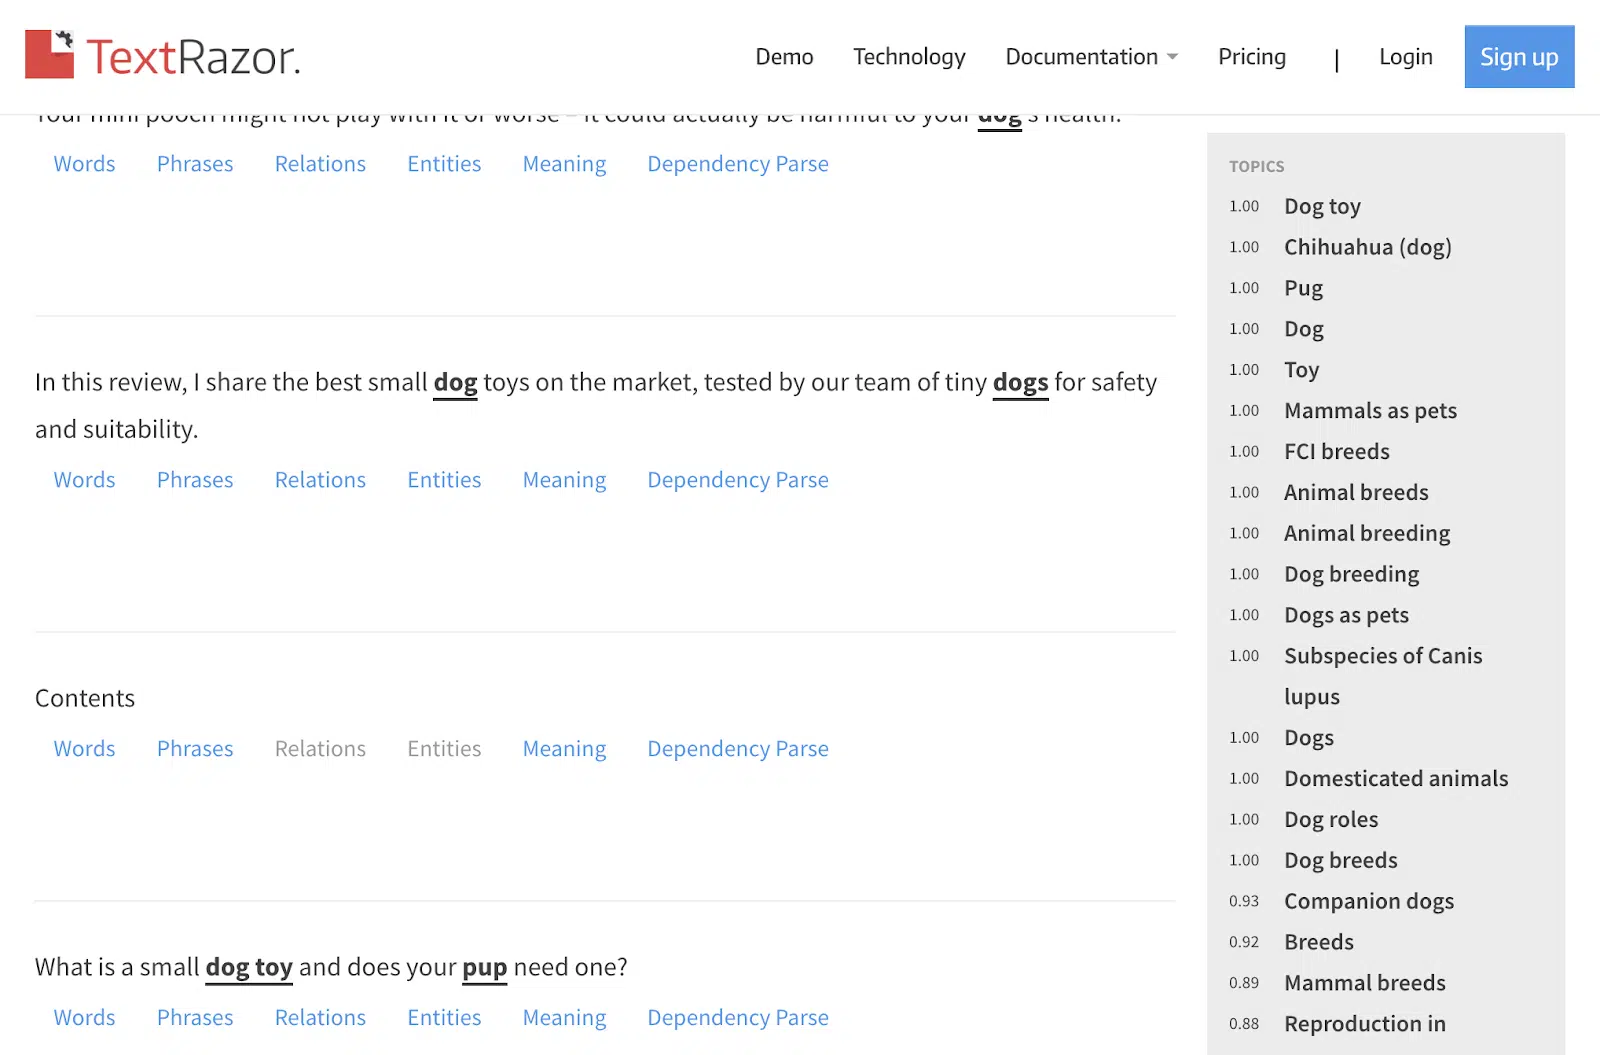
The higher a topic’s score, the more relevant it is to the article.
The key here is to go through this entire list and see how you’re scoring the relevance of the topics.
If there’s a core topic, like “frisbee,” and it doesn’t have a high relevance score, it’s even more important to add it to your outline.
Also, you might want to consider rewriting sentences containing the word “frisbee” to get a higher relevance or relevance score.
For this example, we will select the following topics or entities for which you will get the schema data.
Primary Entities:
Secondary entities:
Chihuahua Yorkshire Terrier Pomeranian Shih Tzus Pugs Frisbee Chew Toy Squeaky Toy Tennis Ball
Not all topics in the sidebar represent an entity known to Wikipedia, Wikidata, or Google.
Therefore, it is important to review all of the bold and underlined words within each sentence that are broken down on the left side of the page.
Get the daily search newsletter marketers trust.
Next, locate a phrase on the left side of the results page that contains your first entity.

In this example, we choose “dog” as the entity.
Then click the Entities tab below the sentence containing the word dog. This will list all the entities within that particular phrase.
We want to copy all entity URLs for this entity and store them temporarily in a document or spreadsheet.
Right-click the first entity in the list and copy its Wikipedia link. In this case, it is:
Then locate the appropriate Google Entity (which should start with “/m/”) and copy the ID. In this case, it is (/m/0bt9lr)
Add your Google Entity ID to the end of this Google Search URL:
So it looks like:
Go ahead and click this to verify that the search results page is showing results for the query “dog”. Great, right?
Finally, search for the Wikidata entity (usually starting with the letter Q) and copy its link (eg http://wikidata.org/wiki/Q144).
You’ll want to repeat this exact process for each entity on your list. If you find that this is something you want to automate more, TextRazor has an API you can work with.
Step 4: Embed the entity URLs into the schema
Now that you’ve collected the Wikipedia, Google, and Wikidata URLs for each entity, you can integrate them into a JSON schema called “about,” which should be nested within the parent schema, such as “Article.”
Follow this structure for each entity:
“About”: [
{
“@type”: “Thing”,
“name”: “Dog”,
“sameAs”: ”
},
{
“@type”: “Thing”,
“name”: “Dog”,
“sameAs”: ”
},
{
“@type”: “Thing”,
“name”: “Dog”,
“sameAs”: ”
}
]
if you validate with Schema.orgit should be like this:

Repeat this process for all your entities.
Step 5: Add an outline to your WordPress theme
This is where things can get a little more technical and you may need the help of a developer or try ChatGPT.
Next, we’ll need to add PHP code that will store all of these entities and their schema markup.
The good news is that once you generate an entity schema, you don’t have to do it again.
The way I’ve coded it for my WordPress site is to associate a WordPress “tag” with each entity.
For example, I have a WordPress tag called “Dog” and any article about a dog has that tag assigned to it.
When this happens, the WordPress code automatically displays the schema of the dog entity.
The great thing is that you can add as many tags as you want to a WordPress post or page, so you can load as many relevant entities as you want into a post with the click of a button.
Here’s a good ChatGPT message to get you started on generating this code:

If you use a plugin like Yoast SEOyou’ll want to adjust the request to incorporate it into its JSON format.
Step 6: Assign tags to your article
Once you have your PHP code in place, you can add tags to your articles.
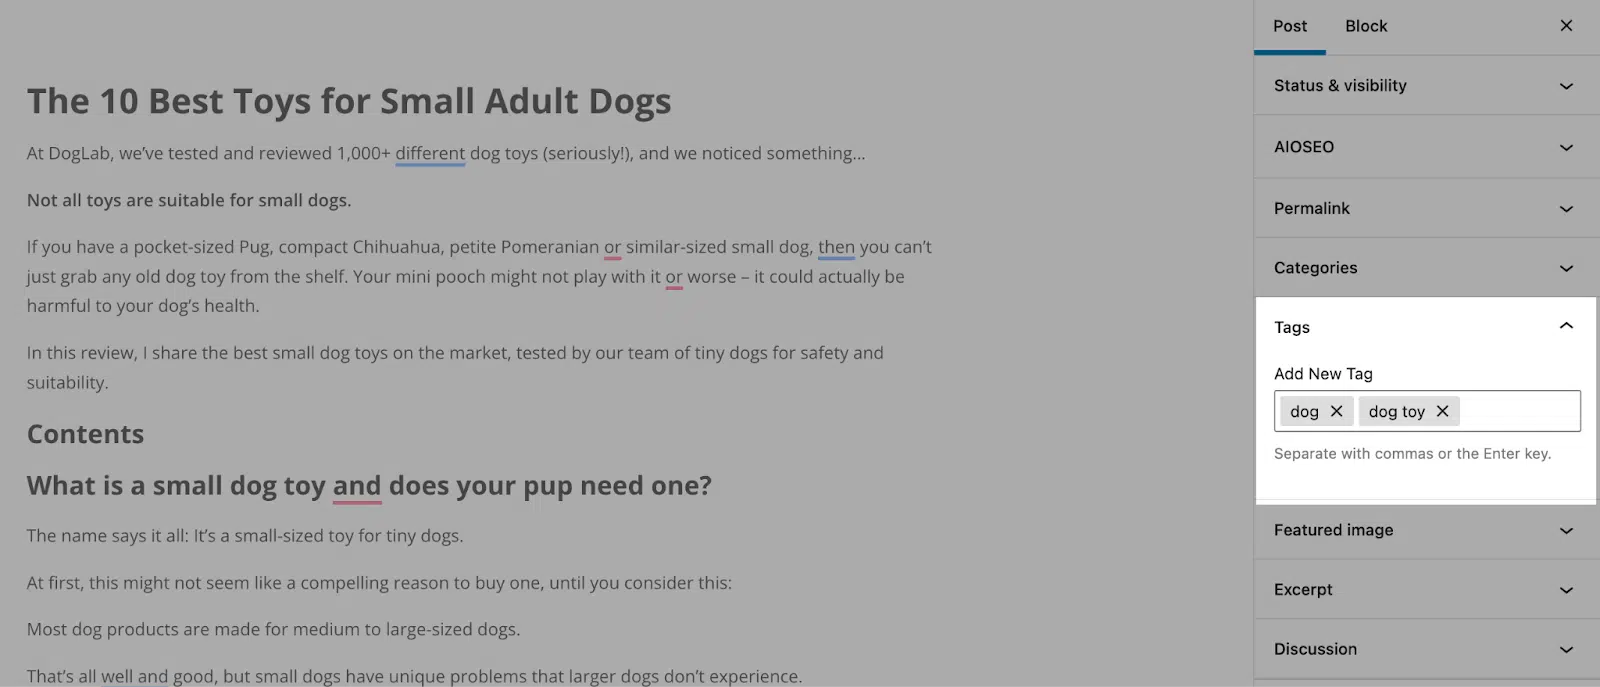
Go to your WordPress dashboard and make sure your article (in this case, “Best Toys for Small Adult Dogs”) has the appropriate tags (eg, “dog”) assigned to it.
The great thing about this example is that once you tag any existing article with “dog”, all those articles will be updated instantly.
Step 7: Rinse and repeat
Repeat this process for any additional entities (eg “toy”, “Chihuahua”, “Yorkshire Terrier”, etc.) that you want to include in your outline markup.
Incorporation of entities in the markup of schemes
Integrating entities into your schema markup is not necessary to rank first in organic search. However, it can help you hedge your SEO bets in the long run.
Writers and AI aren’t perfect. Writing and interpreting page text is not always done perfectly. This means that there is a chance that the relevance and importance of an article’s main themes can be reduced or lost.
If you’re on the fence about this, try it out to see how it works on your site. Find four articles on your site that are topical and add at least 5-10 entities.
You can probably manually edit the schema for test articles only. If it works well, you can integrate it deeper into your site’s code or try WordLift.
The views expressed in this article are those of the guest author and not necessarily Search Engine Land. Staff authors are listed here.
[ad_2]
Source link